Technique
How to Learn the Snatch: A Position-by-Position Progression
Learn the snatch position by position, film useful angles, compare visible evidence, and choose one safe technique change for your next set.
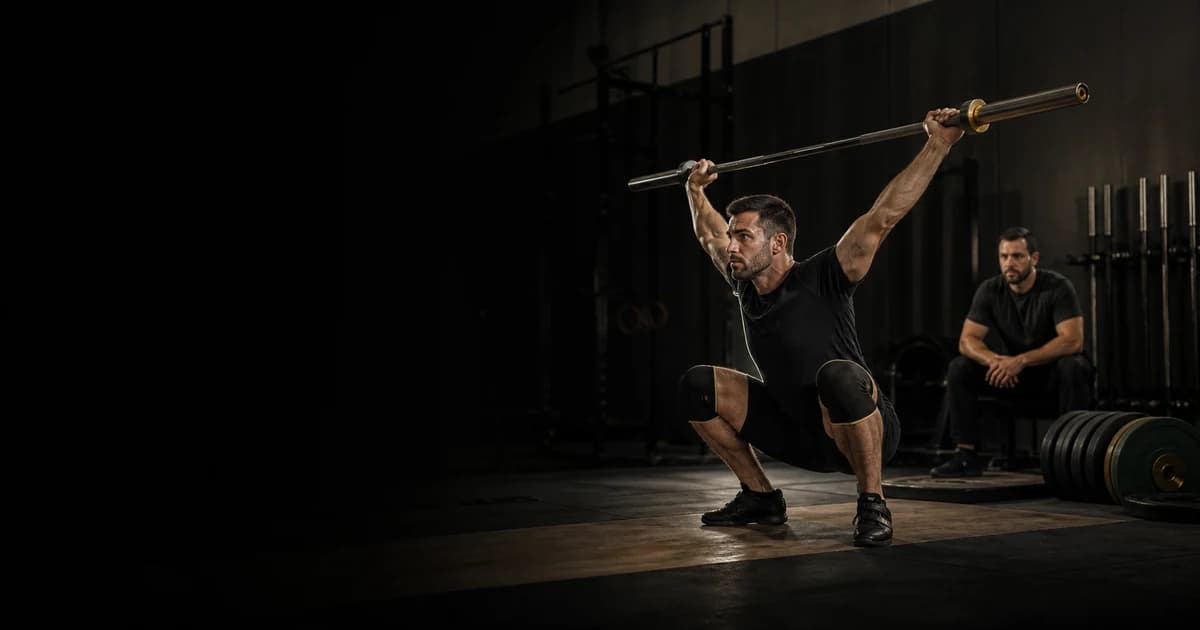
Learn the snatch by building a stable receiving position first, then adding the turnover, extension, transition, and floor start. Practise each stage with an empty bar or suitable training implement until you can repeat its visible checkpoints without rushing. Add load only when the positions remain controlled. A recording can show bar path, balance, timing, and receiving shape, but it cannot establish how a repetition felt, why it changed, whether you felt pain, or whether you are ready for more weight.
What you are learning
In the snatch, you lift the barbell from the platform to overhead in one continuous movement and receive it with locked arms. That simple description hides several linked tasks:
- Start from a balanced position.
- Move the bar from the floor without disrupting the next position.
- Guide the knees and bar through the transition.
- Accelerate while keeping the bar close.
- Pull under instead of continuing to lift the bar with the arms.
- Fix the bar overhead in a controlled receiving position.
- Stand with control.
Learn these tasks in an order that gives each repetition a clear purpose. Trying to correct the entire lift at once makes it difficult to tell which change helped.
Use an observation, decision, and revision loop
Apply the same review method at every stage.
1. Observe
Record the attempt and identify facts that the camera shows. Useful observations include:
- The bar moved forward immediately after leaving the floor.
- The hips rose faster than the shoulders.
- The bar stayed close through the upper thigh.
- The feet landed much wider than they started.
- The elbows reached their locked position after the feet landed.
- The lifter stepped forward to recover the bar.
- The receiving depth changed between repetitions.
Avoid replacing observations with vague judgments such as “bad pull,” “weak turnover,” or “poor mobility.” Those labels do not identify what happened.
2. Decide
Choose one visible priority that affects the stage you are practising. Select a drill, load, or range of motion that lets you address it without creating several new variables.
For example, if the bar moves away during a tall snatch, repeat the tall snatch with a lighter implement and focus on keeping the bar close while moving the body down. Do not also change the starting stance, grip, receiving depth, and number of repetitions.
3. Revise
Perform another small block, then compare it with the first block from the same camera position. Keep the change if the target checkpoint becomes more repeatable without another clear loss of control. Simplify the drill or seek coaching if the pattern becomes less stable.
A useful review asks, “What changed in the recording?” It does not ask the video to explain fatigue, fear, effort, intent, pain, or readiness. Those require information from the lifter and, when appropriate, a qualified coach or healthcare professional.
Position-by-position progression
| Stage | Main practice | Visible checkpoint | Progress when |
|---|---|---|---|
| Overhead receiving | Snatch-grip press, overhead squat | Bar, trunk, knees, and feet settle under control | You can hold the position without chasing the bar |
| Turnover | Muscle snatch, tall snatch | Bar stays close as the body moves underneath | Lockout and foot contact become consistent |
| Extension and pull under | High-hang snatch, hang snatch | Extension connects to an active movement under the bar | You stay balanced and receive without jumping forward |
| Transition | Snatch from below the knee, segmented snatch | Bar and knees pass without the bar swinging away | The hang pattern survives the lower start |
| Floor start | Snatch pull, pause snatch, light snatch | The first pull sets up the same balanced transition | The bar leaves the floor without an early position change |
| Full lift | Light snatch | The stages connect without a rushed start or delayed pull under | Several attempts show the same basic pattern |
This table guides practice, not qualification. A coach may change the order according to your training history, proportions, mobility, strength, equipment, and current program.
Stage 1: Establish the receiving position
Start with a snatch-width grip and an implement you can control. Your exact grip width depends on your structure and coaching context, so do not copy another lifter’s hand position without checking whether it gives you a stable overhead position.
Use a snatch-grip press or controlled overhead squat to explore the receiving shape. From the side, look for a bar position that remains supported over your base rather than drifting forward or backward. From the front, check whether the bar, trunk, and feet settle without a large lateral shift.
Pause in the receiving position. A pause makes instability easier to see and prevents momentum from disguising a position you cannot control.
Visible evidence can show:
- Whether the bar drifts after you reach depth
- Whether one foot moves farther than the other
- Whether the elbows remain fixed
- Whether the chest or hips continue moving after the bar stops
- Whether you must step to save the repetition
Video cannot determine why the position changed. Restrictions, uncertainty, an unsuitable load, fatigue, and pain may produce similar visible results. Do not diagnose the cause from appearance alone.
If you cannot control an unloaded or lightly loaded overhead position, do not force greater depth or add weight. Adjust the implement or range, and ask a qualified coach to assess the task in person.
Stage 2: Learn the turnover
The turnover is not simply an arm action that places the bar overhead. You must keep the bar close while moving your body under it and fixing the receiving position.
A muscle snatch can introduce the bar’s close path and overhead finish without a deep receiving position. A tall snatch removes most of the upward pull, which makes the movement under the bar the main task. Use a light implement because the drill loses its purpose when you rely on extra acceleration.
When reviewing a tall snatch, check:
- Does the bar move away before you move under it?
- Do the elbows travel up before rotating under?
- Do the feet and arms finish at roughly consistent moments?
- Does the bar settle over the base, or must you step?
- Do you receive at the intended depth?
Do not infer that a slow turnover proves slow arms. The bar may have moved too far away, the lifter may have extended the pull for too long, or the chosen load may have changed the movement. Describe the visible sequence first.
For a closer examination of this stage and the full lift, use the snatch technique analysis guide.
Stage 3: Connect extension to the pull under
Move to a high-hang or hang variation once you can show a controlled turnover. The goal is to connect upward acceleration with an immediate movement under the bar.
Set the hang position deliberately instead of lowering the bar and rebounding without control. Keep the load light enough that you can repeat the same start. Record several attempts and compare the point where the bar changes direction relative to your body.
Look for a sequence you can reproduce:
- You begin balanced over the feet.
- The bar remains close through the hang.
- The body finishes the upward action without sending the bar forward.
- You move under promptly.
- The bar settles over your base.
Contact between the bar and body does not, by itself, prove effective extension. Loud contact also does not prove good timing. Judge the bar’s direction, your balance, and the receiving position together.
If you consistently jump forward, inspect where the bar first moves away rather than correcting only the landing. The snatch bar path guide explains how to review the path without treating one traced line as a complete diagnosis.
Stage 4: Add the transition around the knees
Lower the start to below the knee only after the hang variation becomes reasonably consistent. This stage tests whether you can preserve balance while the knees move out of the bar’s path and then return beneath it.
Use a pause below the knee or a segmented lift. A pause gives you time to verify the position before continuing. It also exposes whether you reach the checkpoint with tension and balance or merely pass through it.
From a side view, observe:
- The relationship between shoulders, hips, knees, and bar
- Whether the bar remains close without being pulled backward abruptly
- Whether your balance shifts toward the toes or heels
- Whether the transition leads into your established hang pattern
Do not chase an ideal still image while ignoring the movement into and out of it. A technically useful position must connect to the rest of the lift.
If the lower start causes the entire pattern to change, return to the hang. Strengthen the connection before adding distance. That is a revision, not a failure to progress.
Stage 5: Connect the floor start
The first pull should place you in a useful transition rather than merely move the bar away from the platform. Start each repetition from a deliberate setup. Use the same foot position, grip, and preparation so your comparisons mean something.
A snatch pull, pause snatch, or segmented snatch can help you observe the start without requiring heavy loading. From the side, record the bar’s initial direction and the relative rise of the shoulders and hips.
Useful questions include:
- Does the bar leave the floor smoothly?
- Do the hips rise much faster than the shoulders?
- Does the bar move forward before reaching the knee?
- Does the lifter arrive below the knee in the intended position?
- Does the established hang pattern remain visible afterward?
Avoid correcting the floor start according to the miss alone. A forward miss may begin at the floor, during the transition, during extension, or in the receiving phase. Review the sequence and identify the earliest clear departure.
Stage 6: Combine the full lift
Use light full snatches to connect the stages. Do not expect the complete lift to look identical to every drill. Drills isolate tasks, while the full movement requires you to coordinate them continuously.
Begin with singles so each attempt receives a fresh setup and a clear review. If the pattern stays controlled, a coach may prescribe other repetition structures according to the training plan.
Judge progress by repeatability:
- Do several attempts begin from a similar setup?
- Does the bar follow a similar route?
- Does the transition preserve balance?
- Does the pull under begin at a consistent point?
- Does the bar settle over the base?
- Can you stand without an uncontrolled step?
Follow the methodology for comparing attempts so you do not select one flattering frame and ignore the rest of the lift.
How to film a useful snatch set
Place the camera far enough away to capture the bar, plates, feet, and full overhead position throughout the lift. Keep the camera still. A moving or tilted recording makes comparisons less reliable.
Use two separate views when possible:
- A side or slightly front-side view shows the bar’s horizontal movement, body angles, and balance changes.
- A front or slightly front-side view shows foot placement, lateral shifts, grip symmetry, and the receiving position.
Do not place a phone, tripod, or person where a missed bar could strike them. Keep the lifting platform and bailout area clear. Never walk behind another lifter to obtain a better angle.
Record several attempts from the same location. Changing the camera height, distance, lens, or angle can make an unchanged bar path look different. Compare like with like.
After you have practised the observation loop, record one controlled set and open Olympic Lifting AI: Coach to review the snatch video, then select one visible technique point for your next coached session block.
Worked example: a forward step in the catch
Suppose a lifter records three light snatches from the same side angle. In each attempt, the lifter steps forward during recovery.
“Balance problem” is too broad to guide the next set. The lifter reviews the full sequence and writes down only visible facts:
- Attempt 1: The bar moves forward as it passes the knee. The lifter receives it forward and steps.
- Attempt 2: The bar stays closer until the upper thigh, then moves forward. The lifter steps again.
- Attempt 3: The bar stays closer, but the lifter reaches forward at lockout and steps.
These attempts share an outcome but not one clearly identical cause. The recording also cannot reveal whether the lifter intended to jump forward, felt afraid of sitting under the bar, or experienced discomfort.
The lifter chooses Attempt 2 as the next review target because its earliest visible change occurs near extension. The revision block uses two light high-hang snatches followed by one light full snatch. The camera remains in the same place.
After the block:
- If the bar stays closer and the receiving step becomes smaller or disappears, the lifter keeps the cue for the remaining light work.
- If the hang drill looks controlled but the floor variation still moves forward near the knee, the lifter returns to a below-knee pause variation.
- If control deteriorates across all variations, the lifter reduces the load or stops the technique block.
- If pain appears, the lifter stops and seeks appropriate professional guidance rather than using video to identify an injury.
This process does not prove a permanent correction. It produces a specific next decision from visible evidence.
When to add load
Add load only when the current weight lets you repeat the stage’s main checkpoint. One successful repetition does not establish repeatability.
A practical loading decision can use three outcomes:
| Review result | Next decision |
|---|---|
| Target position repeats and the lift remains controlled | Keep the load or make a small planned increase |
| Target improves, but another major checkpoint deteriorates | Repeat or simplify before increasing |
| Control declines, misses cluster, or the pattern changes sharply | Reduce the load, change the drill, or end the block |
Do not increase weight to test whether a technical error disappears. Extra load can change timing and expose different limitations, but it does not explain the original pattern.
Track attempts, makes, misses, and training volume as context. These numbers cannot replace technique review, but they can show whether you are judging a fresh repetition or one performed after accumulating fatigue.
Common learning errors
Starting from the floor too soon
The floor adds another transition to an unstable pattern. Return to the highest start that lets you reproduce the intended movement.
Adding weight after one good repetition
A single make may hide a variable pattern. Repeat the checkpoint before changing the load.
Reviewing only the catch
The final miss may begin much earlier. Watch the attempt from the first movement to recovery.
Treating a bar-path trace as a verdict
A trace shows motion in the camera’s view. It does not establish force, intent, fatigue, pain, or the reason for that motion.
Changing several variables together
A new cue, drill, stance, grip, load, and camera angle create a poor comparison. Change one main variable and record the result.
Copying another lifter’s positions
Body proportions, mobility, training history, and coaching context differ. Use external examples to understand the task, not to prescribe exact joint angles for yourself.
Continuing after control disappears
Repeated uncontrolled misses do not guarantee useful practice. Reduce the demand or stop the block.
Safety limits
Practise on a suitable weightlifting platform with appropriate equipment and enough space to release the bar safely. Keep people and objects outside the drop area. Use collars and equipment according to the facility’s rules and your coach’s direction.
Stop the set if you feel pain, dizziness, sudden weakness, or loss of control. A video cannot diagnose an injury or confirm that continuing is safe. Seek guidance from a qualified healthcare professional for pain or injury concerns.
A recording also cannot verify your readiness for a load, safely spot a snatch, or replace in-person supervision. Work with a qualified weightlifting coach when possible. The clean and jerk technique guide provides a separate progression for the other competition lift, while the attempt-selection guide covers decisions for competition attempts.
Final checklist
Before the session:
- Choose one stage and one visible checkpoint.
- Select a controllable load or training implement.
- Clear the platform and bailout area.
- Fix the camera in a safe position that captures the complete lift.
During the session:
- Use a consistent setup.
- Record a small block from the same angle.
- Stop for pain, loss of control, or unsafe conditions.
- Avoid changing several variables at once.
After the block:
- Describe visible events without diagnosing their cause.
- Identify the earliest clear departure from the intended sequence.
- Choose one drill, cue, load, or range adjustment.
- Record the revision from the same position.
- Keep the change only if the target becomes more repeatable without creating another major problem.
- Take unresolved patterns, off-camera context, and readiness decisions to a qualified coach.